
Turn a primary button into the secondary variant, or make it small, without touching its styles: pick the value from the props your component already has. The agent then changes the prop where the component is used.
Before you start
Build Mode open on the page, see Open Build Mode and move around your app.
A component from your design system on the page. Plain elements, such as a heading or a div, have styles but no props.
Steps
Click the Design button below the message box, or press
⌘ D, and click the component on the stage. The panel header shows the component's name, and the first section is Component states: one row per prop, with its current value.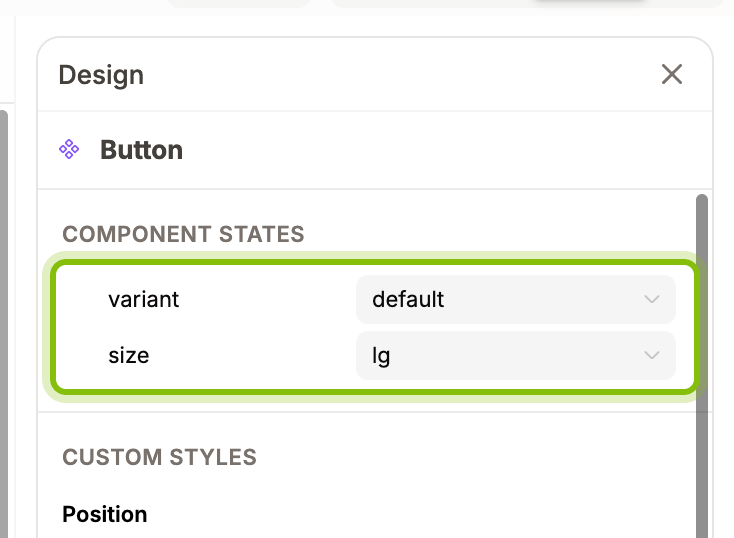
Click the value and pick another one. The menu lists the values the component accepts.
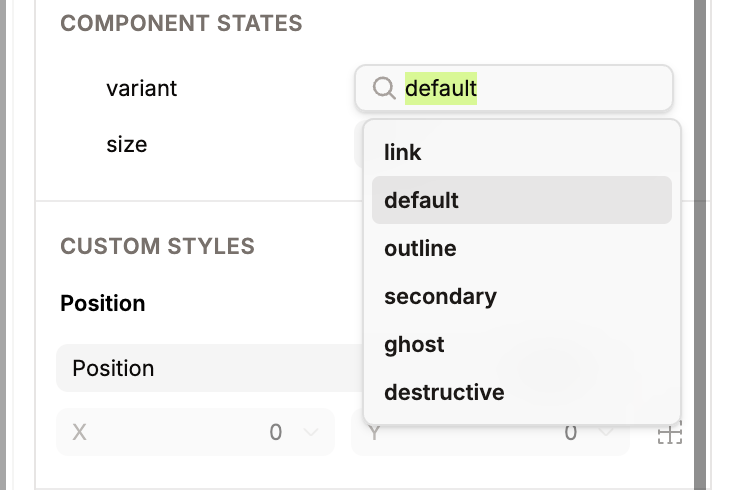
Look at the stage: the component is in its new state at once. To restyle this one instance on top of that, use the groups under Custom styles, see Edit styles directly in your app.
Click Add to build chat. The card above the message box names the component and lists the prop, old value to new value. A dash as the old value means the prop was not set in the code.
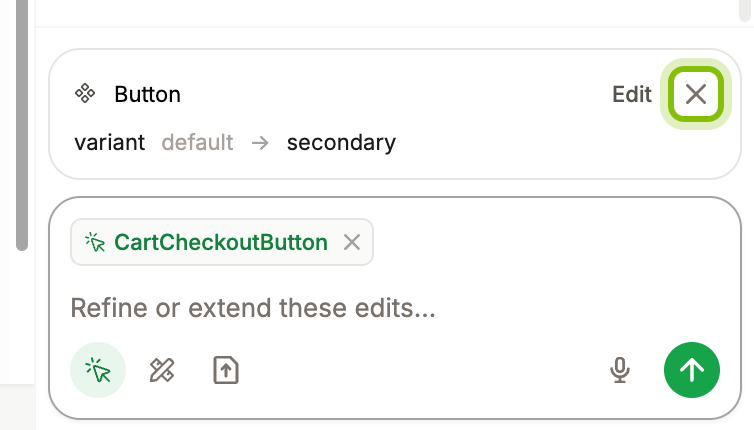
Click Send with the message box empty. The chat shows "Apply visual changes to codebase.", and the agent sets the prop where the component is used.
The reply names the file and line it changed, and the stage reloads with the new state. Custom styles you added ride along in the same apply.
On the canvas
An instance placed on the canvas has the same section in its design panel, there spelled Component States. The menu next to the instance's name offers Swap instance and Detach instance. Those change the canvas, not the code.
If it does not work
There is no Component states section: the element is not a component from your design system. A heading or a div has styles only.
The reply says the edit was skipped because it has no source location: the component was sent before Modeinspect had found where it is used. Select it again, wait a moment, and send the edit again.